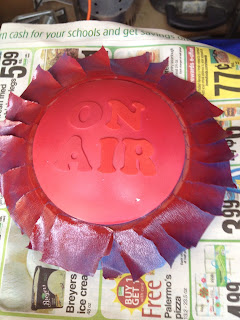
Making an On Air Light for under $5
My daughter has been recording Youtube videos now for quite a while. And on several occasions I'll walk into her room and disturb her during a recording. So I wanted to get her an "On Air" light, but I didn't really want to spend $50. I found this DIY Project: On-Air Studio Light video on Youtube, and built one. So here's the steps I followed.
Supplies Needed
Push Light ($1 from Dollar Tree)
Foam Stickers ($1 from Dollar Tree)
Red Spray Paint ($1.52 from Walmart)
Step One
Arrange the letters to your liking, and stick down. I used tape to line the letters up. Make sure that the letters are arranged so that when the light is hung up, they are aligned correctly (see Step Five).
Step Two
Take small pieces of painter masking tape to cover the base of the light. A little tedious, but doesn't take long when you get into a rhythm.
Step Three
Spray. Probably best outside.
Step Four
Wait a few hours for the paint to dry and carefully remove the tape and the stickers.
Step Five
You only need to do this step if, like me, you forgot to line things up so the letters would be horizontal when you hung up the light :( Take a small and a big drill bit and make a similar slot for the screw head.
Step Six
Mount your new On Air sign and record away without fear of interruption.


